
No Photo Tuesday this week, sorry to say. There will be one next week though, so stay tuned!
I wanted to have something for my amazing viewers, so if you're feeling crafty, here's a tutorial on how to make comic book shoes!

If you’ve been scrolling through Pinterest or browsing Etsy, you may have come across the many comic book shoes available to purchase. If you are the adventurous-crafty type and want to make a pair of your own, just keep reading!
(There are numerous tutorials on youtube and other places, but I thought I would share how easy these shoes are to create and the process we used.)
Materials Needed…
From the Craft Store:
Mod Podge – Matte or Glossy 16 oz size (Your personal preference. I
used Matte for my flats)
Sponge Brush – About 4 or 5. Mostly sold in packs of 25-30 and they
are super cheap!
Scissors – If you don’t own some already! (Make sure they are comfy
because you will be cutting out a lot of images!)
The Craft Store ads – If you don’t have extra newspaper lying around.
The paper makes an easy clean up and you won’t have to
worry about being messy.
Little plastic cups – To pour the Mod Podge in!
From the Comic Book Store or your closet:
Your choice of comics! Look through the comic to see if there are any
poses of the characters or colors you like. One to two comic books are
usually enough to cover a pair of shoes.
From wherever you buy shoes:
If you already own a pair of shoes that you want to revamp, that’s
cool! If not go to your local shoe store and buy a pair.
NOTE: When picking out shoes, make sure they are not covered in an
odd texture. Fuzzy shoes will create an odd look when the comics are
glued down on top. These are the shoes I used if you were curious (link).
Now you’re ready!

Step 1: Prep
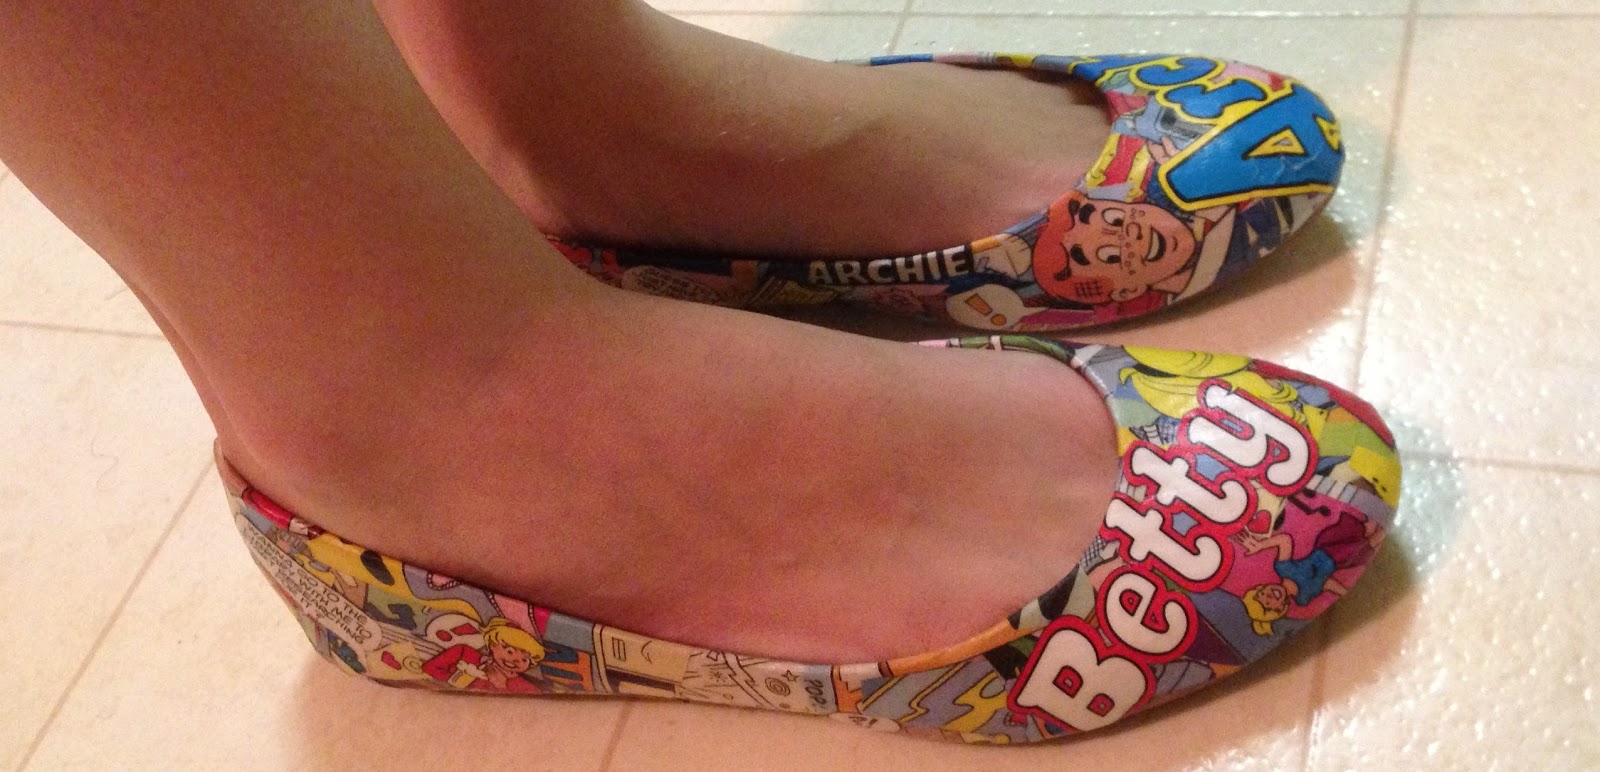
The first thing you will want to do is prep. Get your chosen comic books and start cutting
out the characters, wanted onomatopoeias (I chose to use my old Archie comics
and cut out the “!” and sound effects), speech bubbles, or anything you want as
a focus on the pair of shoes. After you
have the large images cut, then start cutting the pages into shapes. The smaller the better; these will create the
background on the shoe and you want it to look somewhat like a collage. After you have all your pieces cut, lay the
ads/newpaper down where you will be working.
Pour about a half-inch of the Mod Podge into the plastic cups to start
off with. Lay your shoes out and grab a
sponge brush and you are ready to start!

Step 2: Application
Before you start just a quick note: the application process
can take a while. It took me two days to
fully cover the shoes and get them to look just right.
Use the sponge brush to cover an area on the shoes with Mod
Podge. While that is coated you can now
stick the small geometric-background shapes onto the shoe. When you have about 4 or 5 pieces on the shoe
run over them again with the Mod Podge; it will help keep them in place while
you are adding more pieces.

This is where a
sponge brush is better than a regular painting brush. The sponge brush helps keep the Mod Podge
smooth while you are applying so there are no gloppy streaks and it is easier to get rid of bubbles. Keep applying the small shapes until the shoe
is entirely covered. Don’t forget to add
pieces around the lip of the shoe to make it look more complete! This will give it a nice overall appearance
instead of having them stop abruptly before the inside of the shoe. When this is done, you can now place the
larger images onto the shoe! Play around
with placement, and try and create a mini story on your shoes!
Step 3: Coating
Once everything is in place and you are happy with your shoes
it is time to start layering the Mod Podge onto the shoes. You will cover the shoes in a nice layer of
Mod Podge and let them dry fully (Which is about 24 hours). You will repeat this for about 3 – 4
days. This helps the shoe to be
completely sealed and protect the comics from getting wet or tearing easily.
Step 4: Go out and enjoy your new shoes!
Once the last coat has been applied and was able to set for
a day, they are now ready to wear! Just
remember, they are not indestructible.
Take care of them!
Personalization Tips:
Use a style of shoe that you like! I’ve seen heels, pumps,
sneakers, flats, and peep toed shoes covered in comics. Just be sure that the Mod Podge will be able
to stick. When in doubt, Google it!
You don’t have to cover the entire shoe! This is most popular on pumps and heels. The heel is left untouched or the extra
inch-thing-I-don’t-know-what-it’s-called on the pump under the toes. Cap toes are becoming very popular, you can
do just the cap toe of the shoe in comics!
You don’t have to do comics!
I’ve seen people use book pages, music sheets, photography, whatever! I
have yet to see someone use flower petals/ leaves or fabric…
Just have fun with it!
How would you personalize your DIY comic book shoes? Leave a
comment!
No comments:
Post a Comment